A passport photo looks simple until you need to make one yourself.
The image has to be the right size. Your face needs to be centered. The background usually needs to be plain. The file may also need to stay under a specific upload limit.
If you already have a clear photo, you can often prepare it online by cropping, resizing, and compressing it. You do not always need advanced editing software.
But there is one important rule before anything else:
Passport photo size is not the same everywhere.
Different countries, visa forms, exam forms, and ID systems may ask for different dimensions. Some ask for inches. Some ask for millimeters. Some ask for pixels. Some only care that the final file is small enough to upload.
So before you resize a passport photo online, check the official requirement for the form you are submitting.
Check the Required Passport Photo Size First
Do not start by guessing the size.
Start by reading the upload instructions carefully. Most passport or ID forms mention the required photo size somewhere near the upload field.
You may see requirements like:
- 2 x 2 inches
- 35 x 45 mm
- 600 x 600 pixels
- 413 x 531 pixels
- Maximum file size under 200 KB
- JPG or JPEG format only
- White, off-white, light grey, or plain background
A passport photo can look correct to your eyes and still be rejected if the dimensions, file size, or format are wrong.
This is why a good passport size photo editor should help with more than one thing. You may need to crop the face, resize the image, compress the file, and convert the format before upload.
Common Passport Photo Sizes
There is no single passport photo size for every country or application.
Some forms ask for printed dimensions. Others ask for exact pixel dimensions for online upload.
Here are common examples you may see:
| Requirement type | Example size | Common use |
|---|---|---|
| Printed passport photo | 2 x 2 inches | Passport or visa-style square photos |
| Printed document photo | 35 x 45 mm | Passport and ID photos in many countries |
| Online passport photo upload | 600 x 600 pixels | Square digital upload forms |
| Exam or ID form upload | 300 x 400 pixels | School, job, and exam applications |
| Visa-style digital photo | 600 x 600 pixels or larger | Online visa or travel forms |
Use this table as a starting point, not as the final rule.
If the official form says 600 x 600 pixels, use 600 x 600 pixels. If it says 35 x 45 mm, do not upload a square image unless the form also accepts it.
Passport Photo Sizes by Country: Quick Reference
Passport photo rules vary by country, and they can also vary between printed and digital applications.
Here are a few common examples:
| Country or application | Common photo size | Notes |
|---|---|---|
| United States passport | 2 x 2 inches, 51 x 51 mm | Square photo with strict head position and background rules |
| United States online renewal | Digital JPG, JPEG, or HEIF file | File size and upload rules apply separately |
| United Kingdom passport | 45 x 35 mm | Printed photo size; digital photo rules may be checked during online application |
| India passport or consular photo | Often 2 x 2 inches, 51 x 51 mm, or 4.5 x 3.5 cm depending on application type | Requirements can vary by location, form, or service |
This section is only a quick reference.
Always confirm the latest rule from the official passport, visa, or application website before submitting your photo.
Start With a Clear Original Photo
Resizing cannot fix a bad photo.
Start with the clearest image you have. A good passport photo should show your face clearly, with even lighting and a simple background.
Use a photo where:
- Your face is sharp and easy to see
- You are facing the camera directly
- Your head is not tilted
- The lighting is even
- The background is plain
- Your head and shoulders are visible
- The image is not blurry, filtered, or heavily edited
Avoid selfies taken from a high or low angle. A straight, front-facing photo works better.
If the original image is blurry, too dark, or cropped too close to your face, making a passport photo online will be harder. Resize and compression tools can help with dimensions and file size, but they cannot create real detail that is not in the original photo.
Crop the Photo Before Resizing
Cropping should usually come before resizing.
A passport photo is not only about width and height. The face also needs to sit correctly inside the frame.
If the photo has too much empty space, too much background, or your face is off-center, resizing alone will not solve it.
Use the Image Cropper to frame the photo properly before changing the final size.
When cropping:
- Keep your face centered
- Leave enough space above the head
- Do not cut off the chin, shoulders, or hair
- Keep the photo straight
- Match the shape required by the form
For a square passport photo, crop the image into a square shape first.
For a rectangular passport photo, crop it close to the required shape, such as 35 x 45 mm.
This gives you a cleaner result before you resize the image.
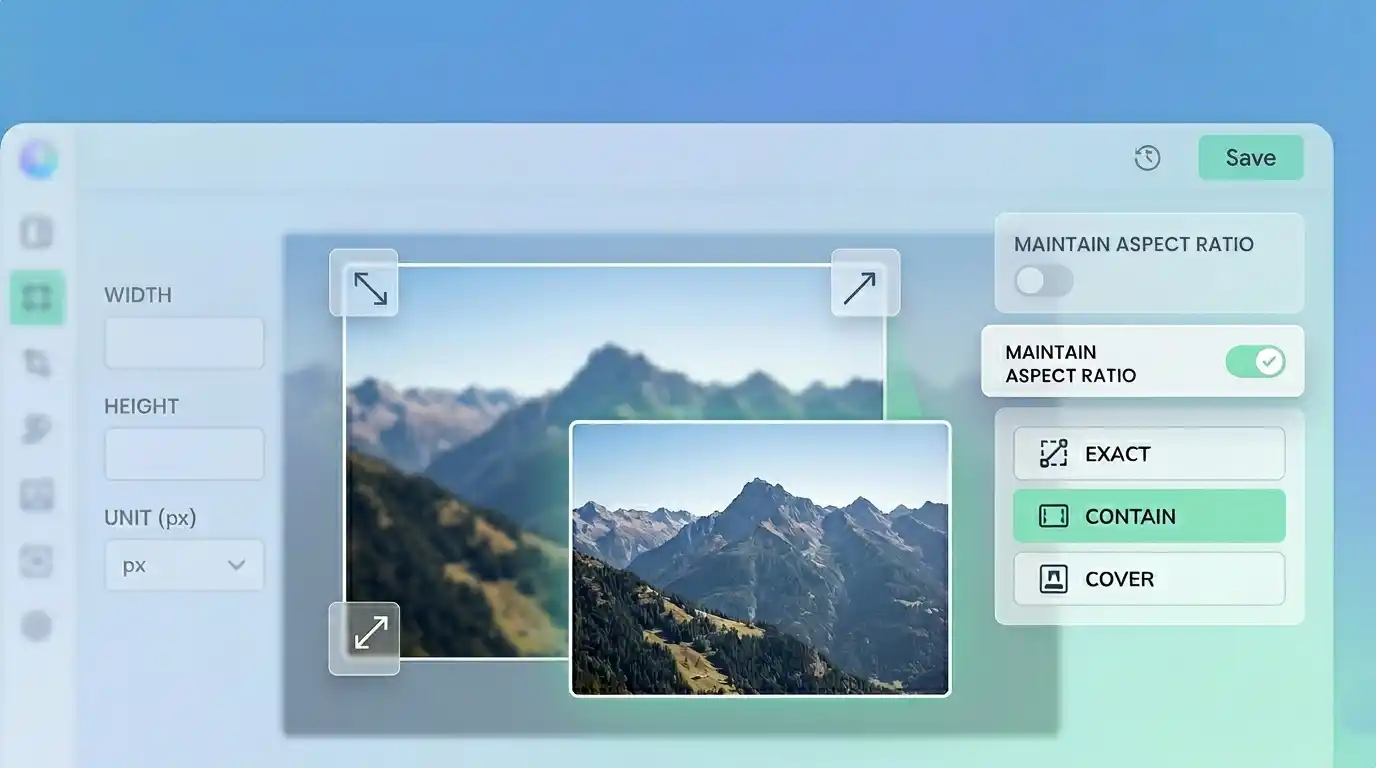
Resize the Passport Photo to the Correct Dimensions
After cropping, resize the image to the required dimensions.
This is where you change the photo’s pixel width and height.
For example:
- If the form asks for 600 x 600 pixels, resize the image to exactly 600 x 600 pixels.
- If the form asks for 413 x 531 pixels, resize it to those dimensions.
- If the form asks for a square image, do not upload a rectangular one.
You can use the Image Resizer to resize a passport photo online and set the exact width and height.
Avoid stretching the image. If your face looks wider, thinner, or unnatural after resizing, the aspect ratio is probably wrong.
The safer workflow is:
Crop the photo to the correct shape first.
Then resize it to the final dimensions.
Watch the Passport Photo Upload Size
Many online forms check more than image dimensions.
They may also check file size.
You may see instructions like:
- Maximum file size: 100 KB
- Maximum file size: 200 KB
- File must be less than 1 MB
- File must be between 20 KB and 100 KB
- File must be JPG only
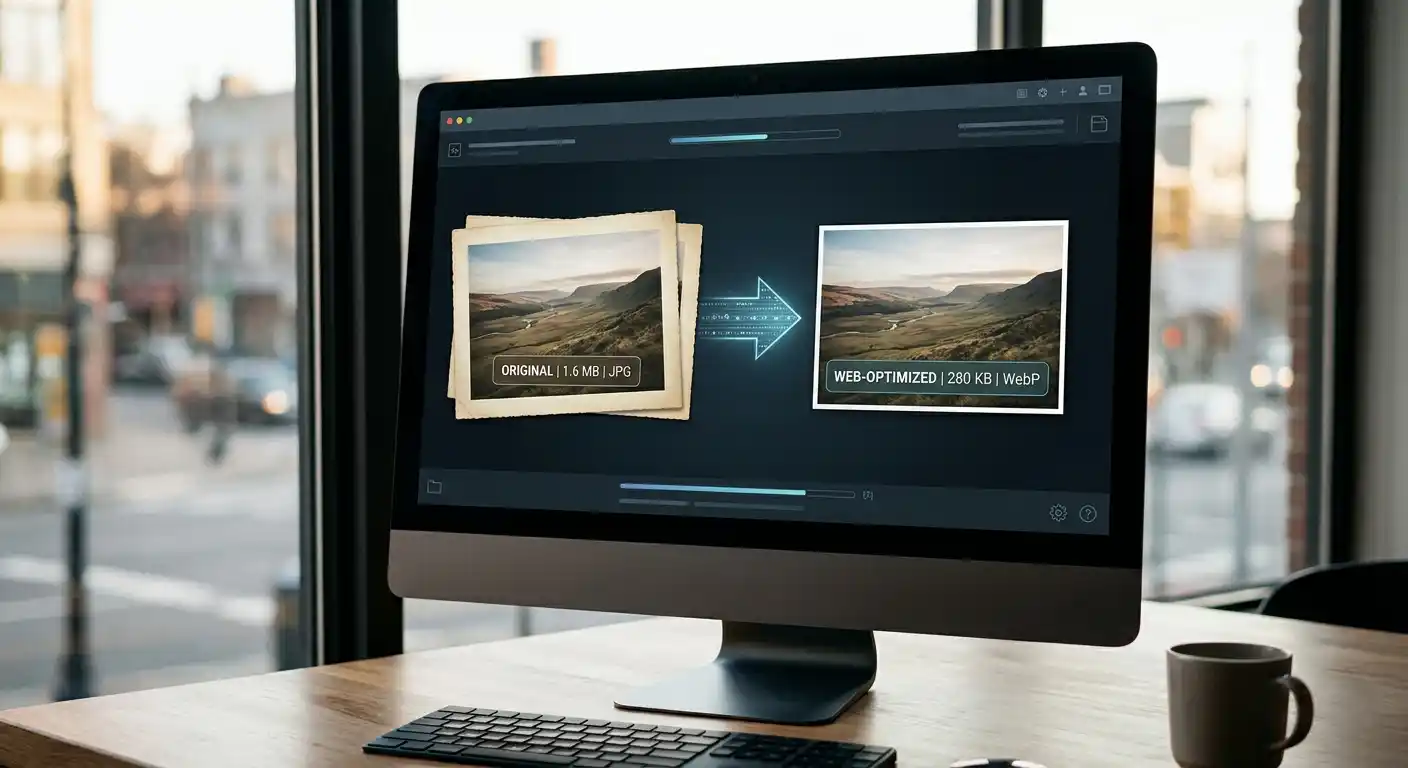
If your photo dimensions are correct but the file is too large, use the Image Compressor before uploading.
Compression reduces file size while keeping the image usable.
For passport photos, do not compress too aggressively. The face should still look clear, sharp, and natural. If the image becomes blocky or blurry, the compression is too strong.
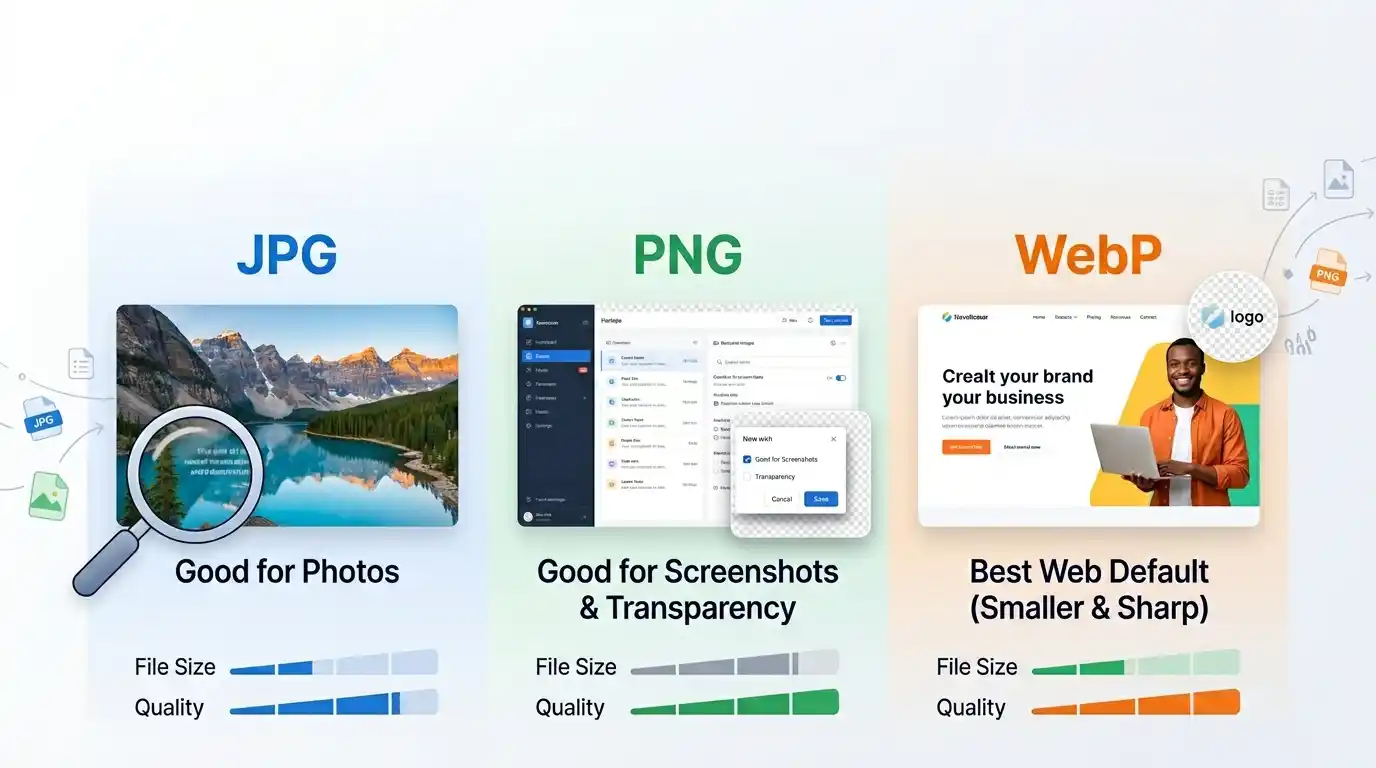
Choose the Right File Format
Most passport photo upload forms prefer JPG or JPEG.
Some may accept PNG. Some newer systems may accept HEIF. But JPG is still the safest format for many document and ID photo uploads.
If your photo is currently PNG and the form asks for JPG, use the PNG to JPG Converter.
If your photo is WebP and the form does not accept WebP, use the WebP to JPG Converter.
For official uploads, follow the format listed in the instructions. Do not assume every form accepts modern image formats.
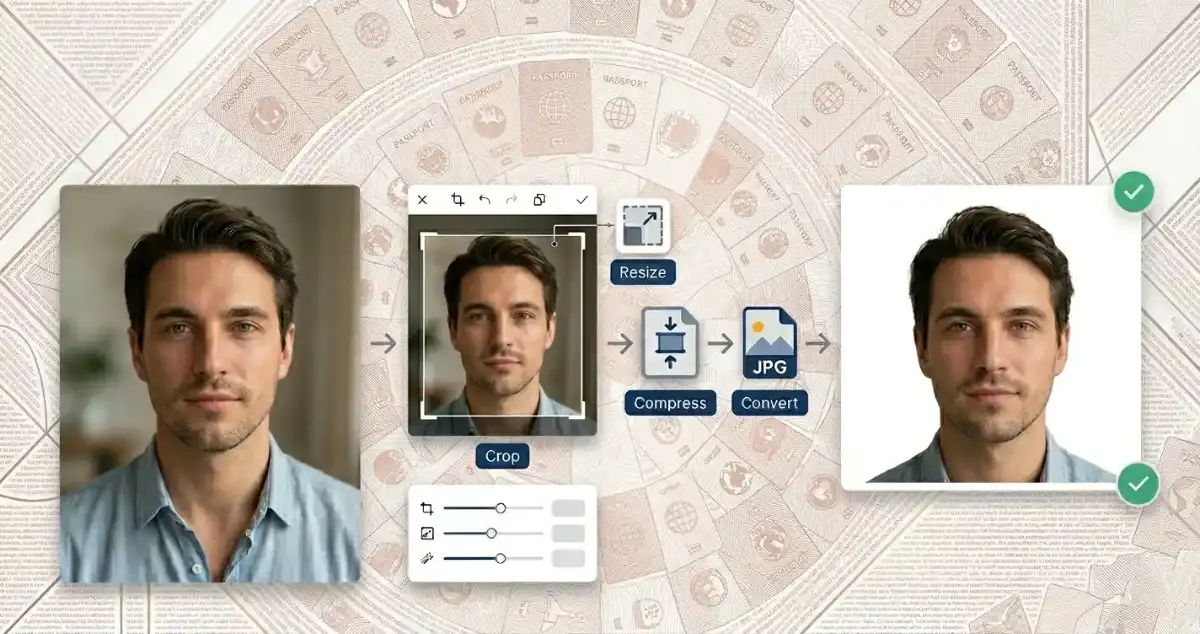
Simple Step-by-Step Workflow
Here is a practical way to make a passport photo online from a regular image:
- Check the official passport photo size.
- Choose a clear front-facing photo.
- Crop the image so your face is centered.
- Resize the photo to the required pixel dimensions.
- Compress the image if the upload file size is too large.
- Convert the image format if the form requires JPG or PNG.
- Preview the final image before uploading.
This order keeps the process simple.
You frame the photo first, set the correct size next, and reduce file weight only when needed.
Example: Resize a Passport Photo to 600 x 600 Pixels
Let’s say an online form asks for a 600 x 600 pixel passport photo.
Start with a clear portrait photo.
First, crop the image into a square. Keep your face centered and leave a little space above your head.
Then resize the cropped image to 600 x 600 pixels with the Image Resizer.
If the final file is too large, reduce it with the Image Compressor.
Before uploading, check the result. The image should be square, clear, and not stretched.
Example: Resize a Passport Photo to 35 x 45 mm
Some passport and visa systems use a rectangular photo size, such as 35 x 45 mm.
This is not the same shape as a square 2 x 2 inch photo.
If your application gives a pixel size, use that pixel size directly. If it only gives millimeters, check whether the form is asking for a printed photo or a digital upload.
For a 35 x 45 mm style photo, crop the image vertically. Keep the face centered and avoid cutting too close around the head.
Then resize or export the image according to the form’s final requirement.
Should You Use DPI for Passport Photos?
DPI matters more for printed photos than online uploads.
If you are uploading a digital passport photo, focus on:
- Pixel dimensions
- File size
- File format
- Face position
- Image clarity
If you are printing a passport photo, DPI can matter because the photo needs enough detail at the physical print size.
For many print workflows, 300 DPI is commonly used for sharp results. But if the official instructions give a different rule, follow that rule.
The simple version is:
For online upload, pixels and file size matter most.
For print, inches, millimeters, and DPI matter more.
Common Passport Photo Mistakes to Avoid
A few mistakes cause many passport photo problems.
The first is using the wrong passport photo size. A 2 x 2 inch photo and a 35 x 45 mm photo are not the same shape.
The second is stretching the image during resizing. This can make the face look unnatural.
The third is uploading a file that is too large. Even if the photo looks right, the form may reject it because the file size is over the limit.
Other common issues include:
- Cropping too close to the face
- Leaving too much empty background
- Using a blurry original image
- Uploading WebP when the form asks for JPG
- Ignoring country-specific rules
- Compressing the photo until the face loses detail
A good passport size photo is not just small enough to upload. It should also be clear, properly framed, and accepted by the form.
FAQ
What is the correct passport photo size?
It depends on the country and application. Some use 2 x 2 inches, some use 35 x 45 mm, and some online forms ask for exact pixel dimensions like 600 x 600 pixels. Always check the official requirement.
Can I resize a passport photo online?
Yes. You can resize a passport photo online by cropping the image first, setting the required width and height, and compressing the file if the upload size is too large.
What is the best format for a passport photo?
JPG or JPEG is commonly accepted for passport and ID photo uploads. Some systems accept PNG or HEIF, but many official forms still prefer JPG.
Can I make a passport photo from any image?
Not every image will work. The original photo should be clear, front-facing, well-lit, and properly framed. A blurry selfie or heavily filtered photo may be rejected even after resizing.
How do I reduce passport photo file size?
Resize the image to the correct dimensions first, then use an image compressor to reduce file size. Keep the compression moderate so the face remains clear.
Is a passport size photo editor enough for official documents?
A passport size photo editor can help with cropping, resizing, compression, and format conversion. But you still need to follow the official rules for background, face position, expression, lighting, and photo age.
Final Thoughts
Resizing an image for a passport photo is not only about making the file smaller.
You need the correct passport photo size, proper framing, clear image quality, and the accepted file format.
Start by checking the official requirements. Then crop the photo, resize it to the required dimensions, compress it if needed, and convert the file format only if the form asks for it.
A few careful steps can save you from rejected uploads and repeated edits.
Sources checked for country-size examples:
- U.S. passport photo requirements: https://travel.state.gov/content/travel/en/passports/how-apply/photos.html
- U.S. digital passport photo upload rules: https://travel.state.gov/content/travel/en/passports/how-apply/online-renewal-photo.html
- UK passport photo requirements: https://www.gov.uk/photos-for-passports/photo-requirements
- India passport photo requirements PDF: https://embassy6.passportindia.gov.in/AppMissionUIProject/pdf/GPSP_PhotoGraph_SOP.pdf