Sometimes an image is almost right.
The photo is clear. The subject looks good. The file is usable.
But something feels off.
Maybe the image is sideways. Maybe it was taken upside down. Maybe the text is facing the wrong direction. Maybe you need a mirrored version for a design, product mockup, or layout.
That is where simple image adjustments help.
You do not always need a full photo editor. For many everyday fixes, you only need to rotate, flip, mirror, crop, or resize the image.
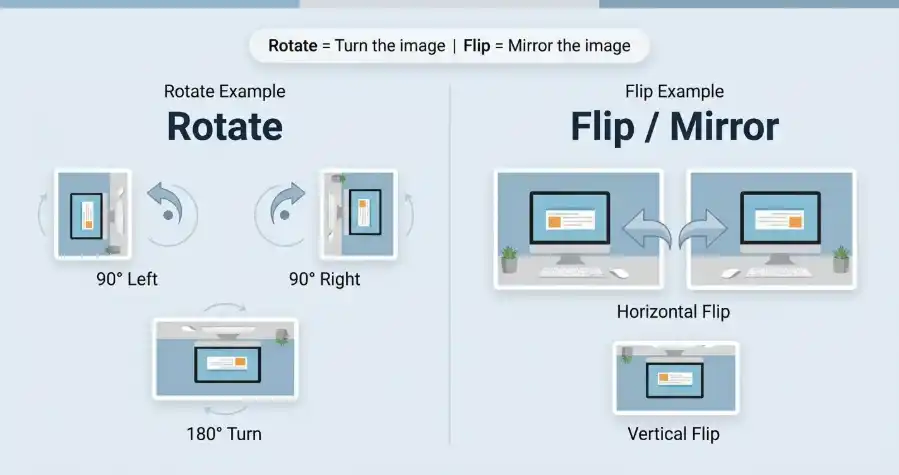
What Does It Mean to Rotate an Image?
Rotating an image means turning it around a fixed point.
Most people rotate images when a photo is sideways or upside down.
Common rotation options include:
- Rotate left 90 degrees
- Rotate right 90 degrees
- Rotate 180 degrees
- Straighten a photo that is facing the wrong way
If you took a photo on your phone and it appears sideways after uploading, rotation is usually the fix.
You can use the Image Rotator to rotate image files online without opening heavy editing software.
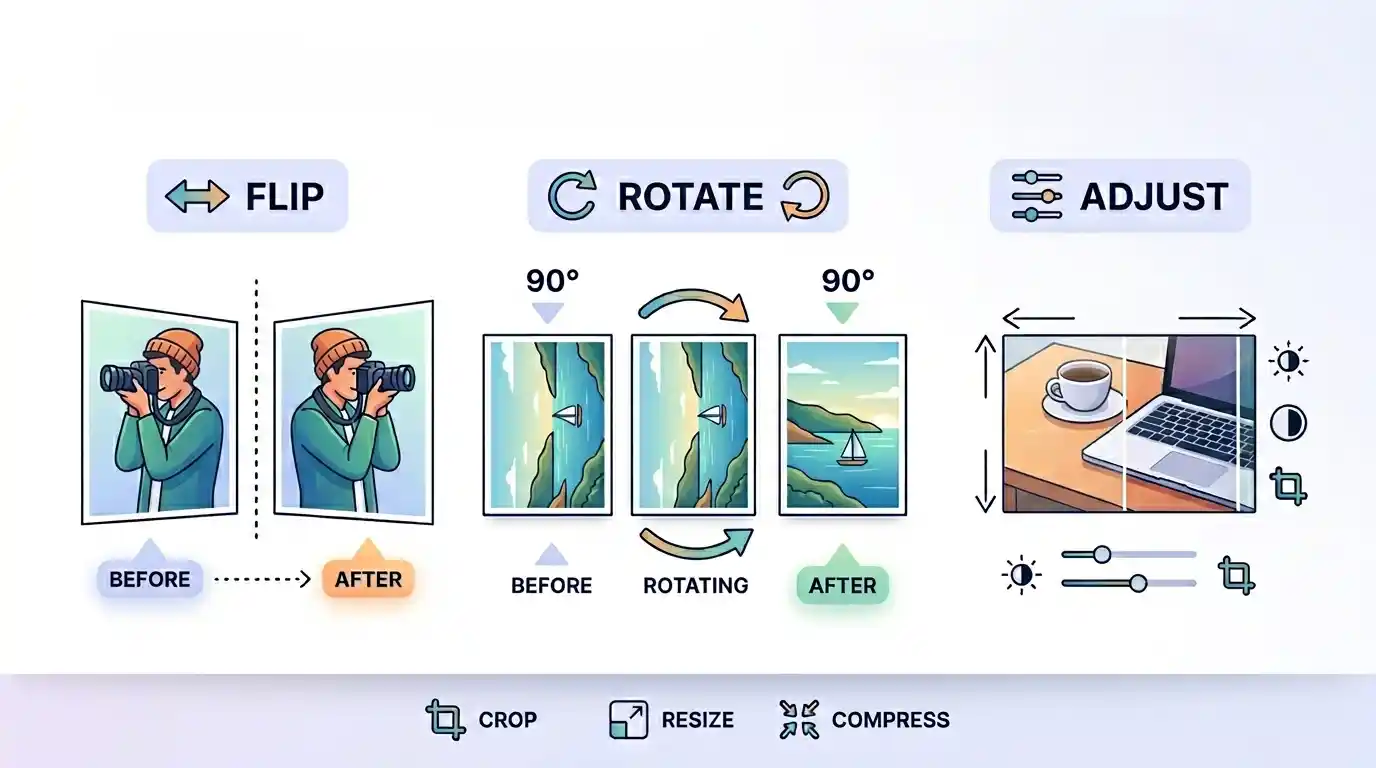
What Does It Mean to Flip or Mirror an Image?
Flipping an image means reversing it.
A horizontal flip creates a mirror image from left to right.
A vertical flip turns the image upside down from top to bottom.
People often use both words for the same idea:
- Flip image online
- Mirror image online
- Flip horizontally
- Flip vertically
- Reverse an image
- Make a mirrored photo
If you want a photo to face the opposite direction, you usually need a horizontal flip.
If you want the top and bottom reversed, use a vertical flip.
The Image Flipper helps you flip images horizontally or vertically and download the result.
Rotate vs Flip: What Is the Difference?
Rotate and flip are not the same thing.
Rotation turns the image.
Flip reverses the image.
Here is a simple comparison:
| Action | What it does | Best for |
|---|---|---|
| Rotate left | Turns the image 90 degrees counterclockwise | Fixing photos leaning sideways |
| Rotate right | Turns the image 90 degrees clockwise | Fixing sideways phone photos |
| Rotate 180 degrees | Turns the image upside down | Correcting fully inverted images |
| Flip horizontal | Mirrors the image left to right | Making a subject face the other direction |
| Flip vertical | Mirrors the image top to bottom | Creating upside-down reflections or design effects |
If the image is facing the wrong direction, rotate it.
If the image needs to be mirrored, flip it.
That small difference saves a lot of confusion.
When Should You Rotate an Image?
Rotate an image when the whole photo is turned the wrong way.
This happens often with phone photos, scanned documents, screenshots, and images downloaded from different apps.
Use rotation when:
- A photo appears sideways
- A document scan is turned left or right
- A landscape image opens as portrait
- A portrait image opens as landscape
- A product photo needs the correct upright position
- A screenshot was captured in the wrong orientation
Most of the time, a 90-degree left or right rotation is enough.
If the image is completely upside down, rotate it 180 degrees.
When Should You Flip or Mirror an Image?
Flip an image when you want the left and right sides reversed, or the top and bottom reversed.
This is useful for design, layout, product photos, and creative edits.
Use a horizontal flip when:
- A person should face the other direction
- A product should point toward text or a button
- You need a mirror image for a design
- A selfie looks reversed and you want to correct it
- A layout feels better with the subject on the other side
Use a vertical flip when:
- You want an upside-down reflection effect
- You are creating a graphic design layout
- You need to reverse top and bottom for a specific visual effect
One warning: flipping text will make it unreadable.
If your image contains text, signs, labels, or numbers, check the final result carefully after flipping.
How to Flip, Rotate, and Adjust Images Online
Start with the problem you see.
If the photo is sideways, use the Image Rotator.
If the photo needs to face the opposite direction, use the Image Flipper.
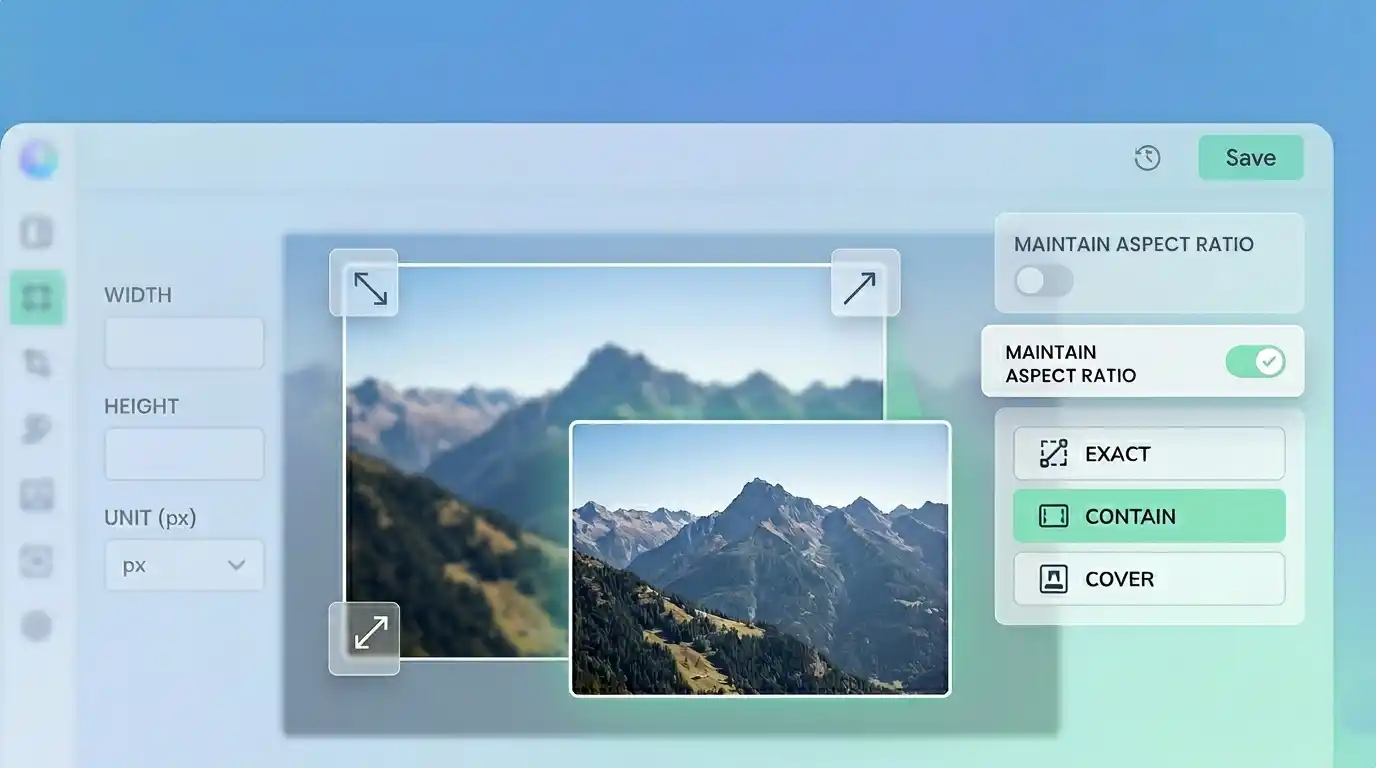
If the image has too much empty space after the adjustment, use the Image Cropper.
If the final image is too large for your website or upload form, use the Image Resizer or Image Compressor.
A simple workflow looks like this:
- Open the image.
- Rotate image if the orientation is wrong.
- Flip image if you need a mirrored version.
- Crop the image if the framing needs cleanup.
- Resize it if the dimensions are too large.
- Compress it if the file size is too heavy.
- Download and preview the final image.
You do not need every step every time.
Fix only what the image needs.
Fixing Sideways Photos
Sideways photos are one of the most common image problems.
This often happens when a phone, camera, or app saves orientation data in a way another platform does not read correctly.
The image may look fine in one app and sideways somewhere else.
A quick rotation solves it.
Open the image in the Image Rotator, turn it left or right, and save a new corrected version.
After that, preview the file before uploading it to your website, form, or social media post.
Small step. Big difference.
Mirroring Images for Design and Layout
A mirrored image can change the balance of a design.
For example, imagine a product photo where the object points to the left, but your text is also on the left. The layout may feel crowded.
A horizontal flip can make the product face the text or point toward a button.
This is common in:
- Website banners
- Social media graphics
- Product mockups
- Blog cover images
- Posters and flyers
- Thumbnail designs
Use the Image Flipper when you want to mirror image content quickly.
Just remember to check for text. If there is text inside the image, a horizontal flip will reverse it.
Adjusting Images Before Uploading to a Website
Image orientation is only one part of a good upload.
After rotating or flipping an image, check the rest of the file.
Ask yourself:
- Is the subject still centered?
- Does the image need cropping?
- Is the file too large?
- Does it need to be resized for the page?
- Is the final image still sharp?
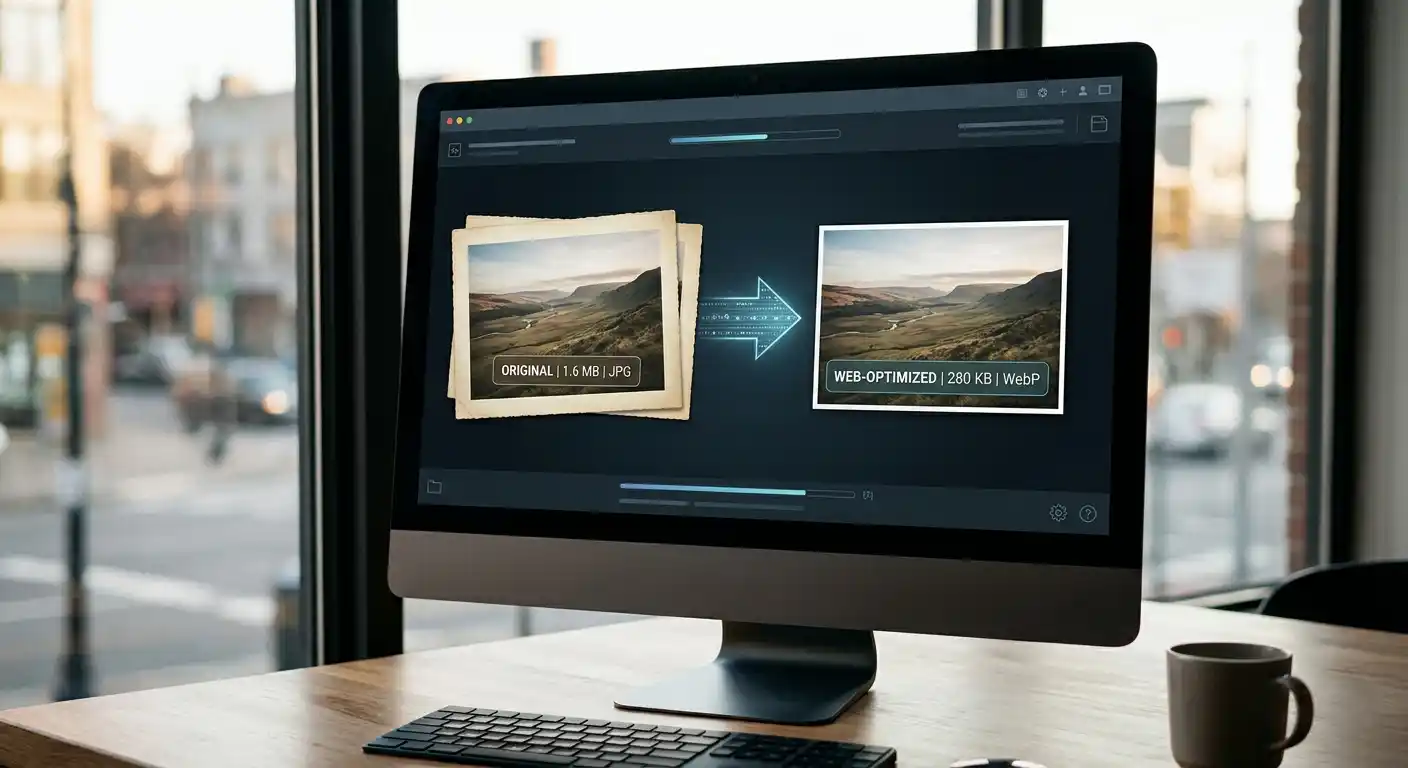
If the image is going into a blog post, product page, or tool page, do not upload a huge file unless you need that size.
Use the Image Resizer to reduce large dimensions.
Then use the Image Compressor if the file is still heavy.
This keeps the image easier to upload and faster to load.
Rotate and Flip for Social Media Images
Social media images are unforgiving.
A small orientation mistake can make a post look careless.
Before posting, check whether the image looks correct in the final layout. A photo may look fine in your gallery but appear cropped or rotated after upload.
Use rotation to fix sideways images.
Use flipping when the subject needs to face the opposite direction for the design.
Use cropping if the platform shape is different from your original image.
This is especially useful for:
- Facebook cover images
- Instagram posts
- YouTube thumbnails
- Pinterest graphics
- Profile banners
For social media, the final image should be clear at a glance. If people need to tilt their head or zoom in, something is off.
Does Rotating or Flipping Reduce Image Quality?
Rotating or flipping an image does not have to ruin quality.
A simple 90-degree rotation or mirror flip usually keeps the image looking the same visually.
Quality loss is more likely to happen when you repeatedly export the same image, resize it too small, or compress it too heavily.
To keep image quality clean:
- Start with a clear original image
- Avoid exporting the same image many times
- Resize only when needed
- Use moderate compression
- Preview the final image before uploading
If the image looks blurry after editing, the problem may be compression, resizing, or the original file quality rather than the rotation or flip itself.
Common Mistakes to Avoid
The first mistake is using flip when you really need rotation.
If the image is sideways, rotate it. Do not flip it.
The second mistake is flipping images with readable text. A mirrored sign, label, or number can look strange and unprofessional.
Other common mistakes include:
- Stretching the image after rotating
- Cropping too much after flipping
- Uploading a huge corrected image without compression
- Saving the image many times until quality drops
- Forgetting to preview the final version
- Mirroring product photos in a way that makes them inaccurate
A quick edit should make the image clearer, not more confusing.
FAQ
How do I rotate an image online?
Use an online image rotator, upload your image, choose rotate left or rotate right, then download the corrected file.
How do I flip an image online?
Use an image flipper, upload your image, choose horizontal flip or vertical flip, preview the result, and download the mirrored image.
Is flipping the same as rotating?
No. Rotating turns the image. Flipping reverses the image like a mirror.
What is a horizontal flip?
A horizontal flip mirrors the image from left to right. It makes the left side become the right side and the right side become the left side.
What is a vertical flip?
A vertical flip mirrors the image from top to bottom. It turns the top of the image into the bottom and the bottom into the top.
Why is my photo sideways after uploading?
Some phones and apps save orientation data differently. A photo may look correct in one app but sideways somewhere else. Rotating and saving a new version usually fixes it.
Does rotating an image reduce quality?
A simple rotation usually does not visibly reduce quality. Quality problems are more likely from heavy compression, repeated exports, or resizing the image too small.
Final Thoughts
Rotating, flipping, and mirroring images are small edits, but they can make a big difference.
Use rotation when a photo is sideways or upside down.
Use flip when you need a mirrored image or want the subject facing the other direction.
After that, check the framing, size, and file weight before uploading.
A clean image does not need heavy editing. Sometimes it only needs one small adjustment to feel right.