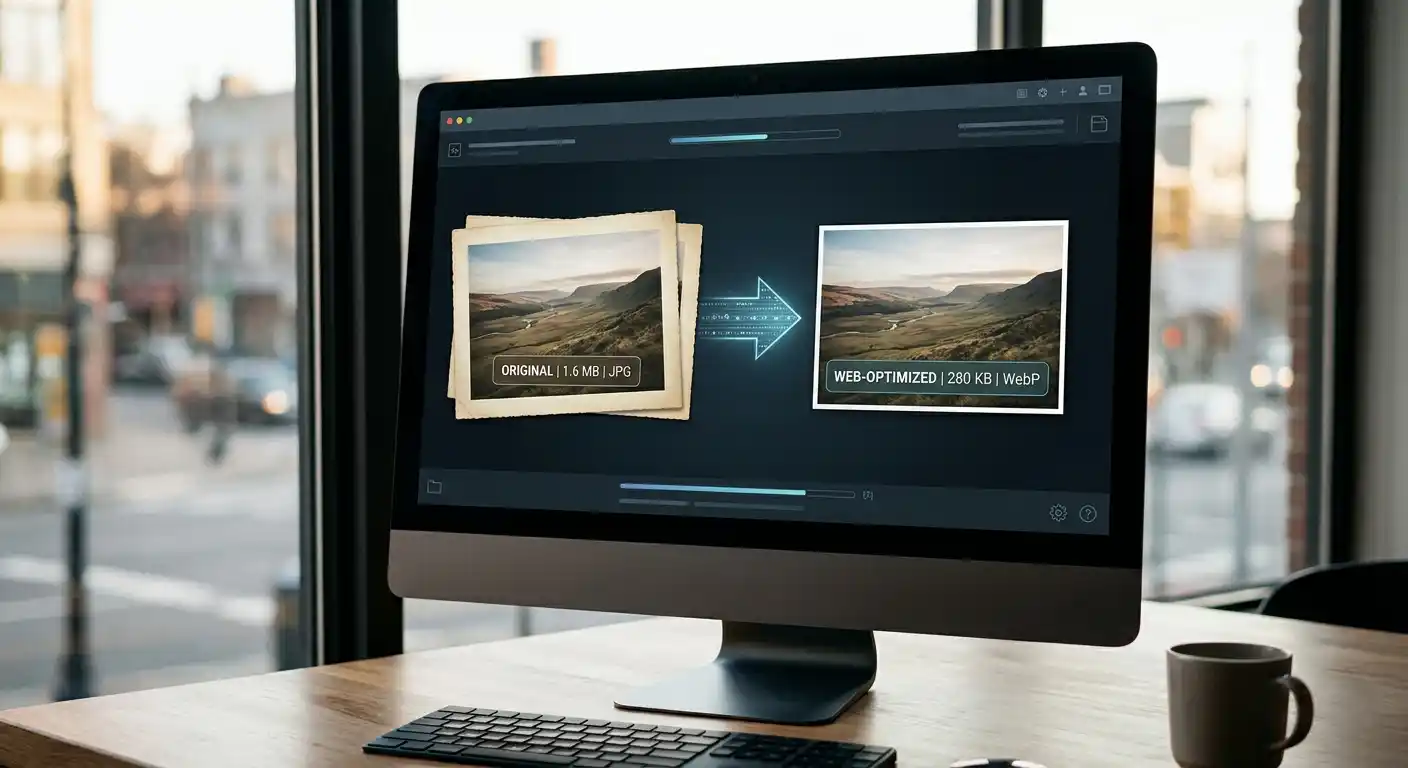
Large images slow down websites, clog email attachments, and make uploads harder than they need to be. Here is how to shrink an image properly without turning it soft, noisy, or full of compression artifacts.
I wanted a compressor that felt practical, not gimmicky. Most tools either push files to a server, add unnecessary steps, or hide useful settings. This one runs locally in the browser, so your data never leaves your device and no server-side uploads are required.If you just want to reduce file size quickly, use the Image Compressor tool.
Why Large Images Cause Problems
Image files are often much bigger than they need to be. A photo from a phone or camera can look fine on a webpage at 1200 pixels wide, but still carry several megabytes of unnecessary data.
That extra weight affects page speed, mobile performance, and storage. If you upload images to a blog, ecommerce store, portfolio, or CMS, oversized files make everything slower.
What Image Compression Actually Does
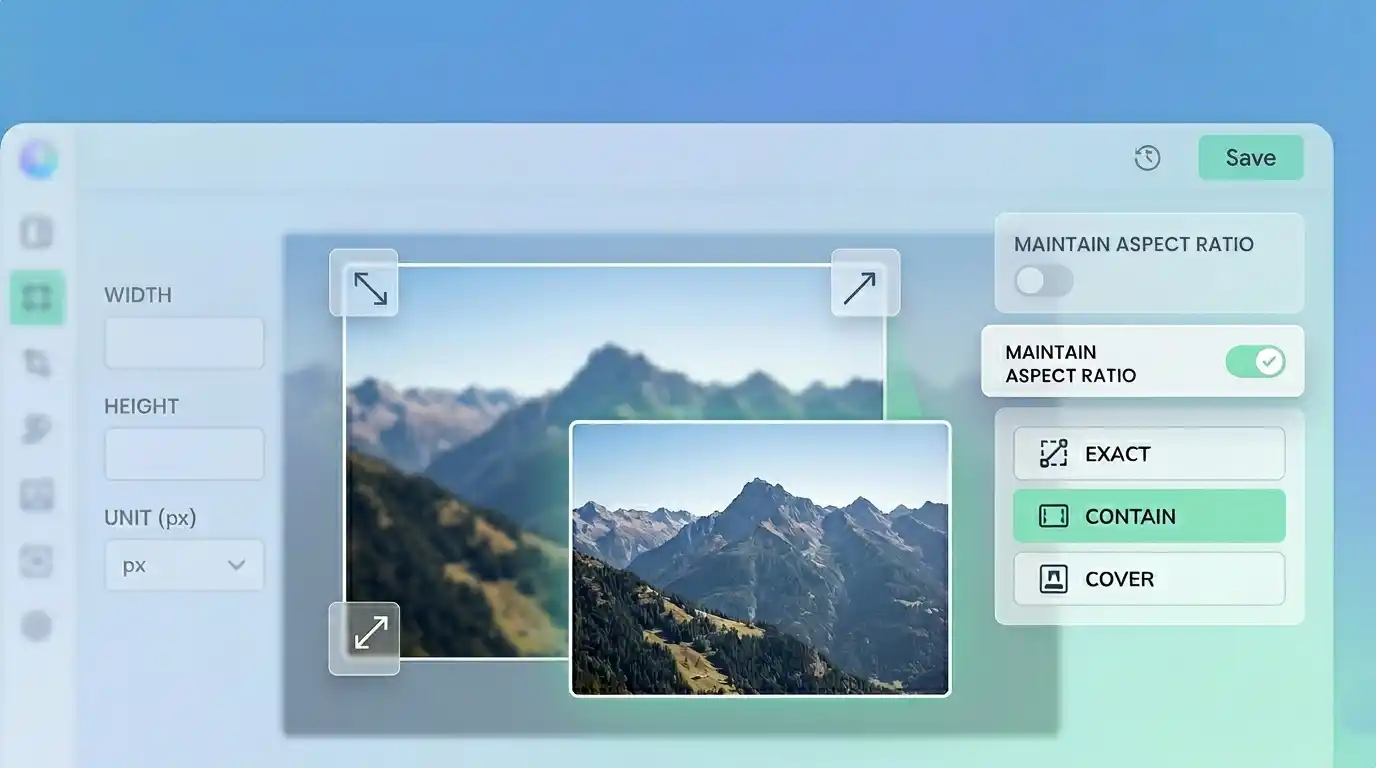
Compression reduces file size by storing image data more efficiently. The goal is not to make the image smaller on screen. The goal is to keep the same dimensions while cutting unnecessary bytes.
That is different from resizing. Compression changes how the image is encoded. Resizing changes the width and height.
If a file is still too heavy after compression, the image is probably larger than the layout actually needs. In that case, resizing should come next.
Lossy vs Lossless Compression
There are two main approaches to image compression: lossy and lossless.
Lossless compression reduces file size without permanently discarding visible image information. It is a better fit for logos, screenshots, interface graphics, and images with sharp text.
Lossy compression removes some image data to achieve a much smaller file. When the settings are sensible, the difference is often hard to notice at normal viewing size, especially for photos.
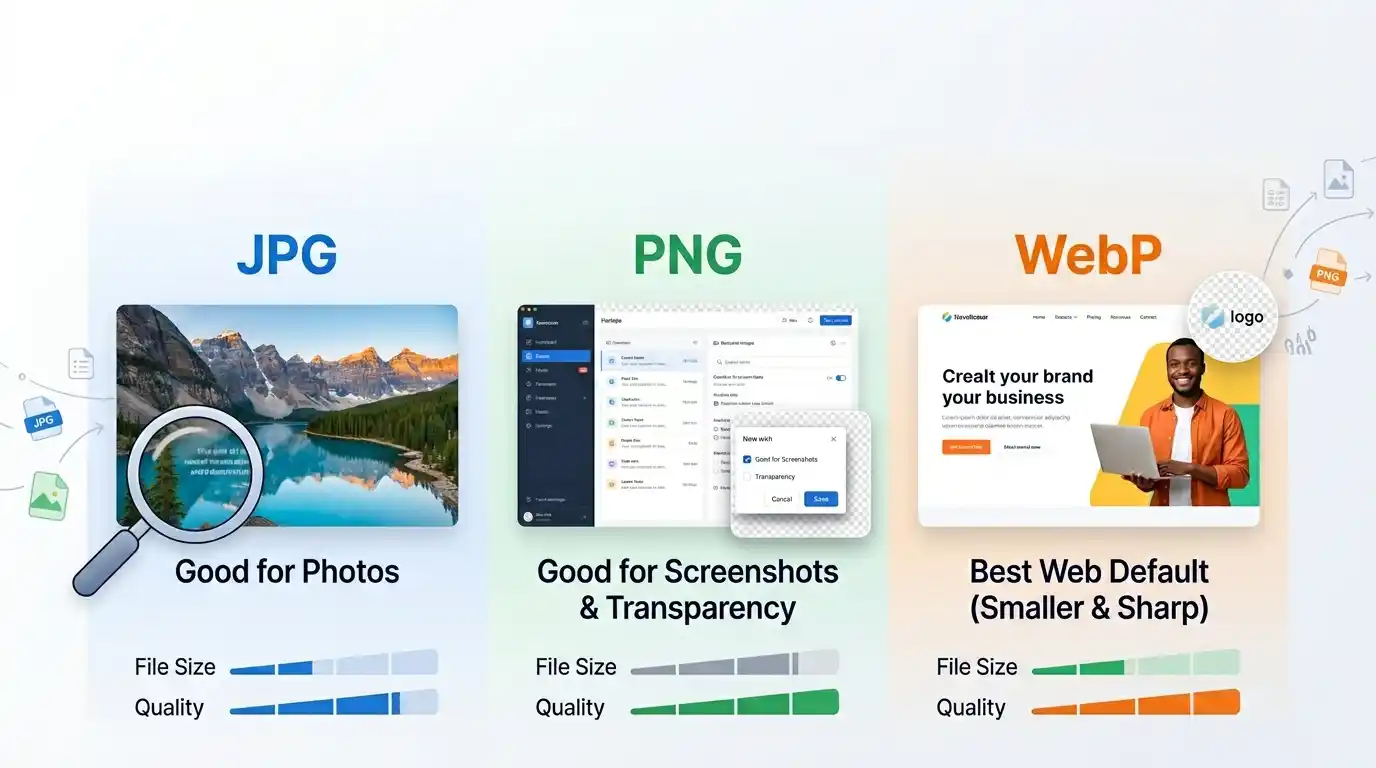
This is why format choice matters. JPEG and WebP are usually stronger options for photos. PNG is useful when you need transparency or crisp edges, but it often stays larger.
How to Compress an Image Without Losing Quality
The safest workflow is simple. Start with a moderate setting, compare the result visually, and only push harder if the file is still too large.
With this tool, the process looks like this:
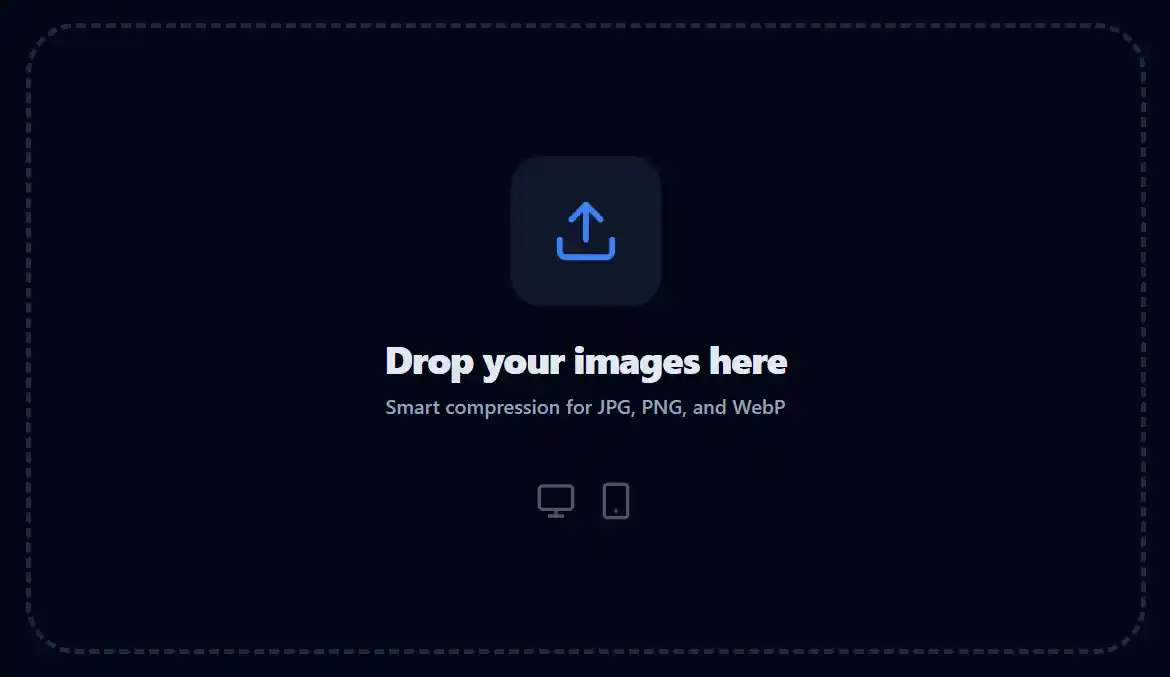
- Upload your image
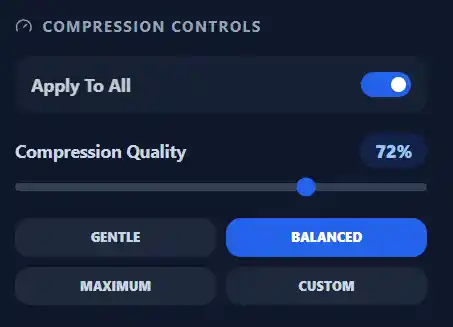
- Choose a preset like Gentle, Balanced, or Maximum
- Adjust Compression Quality if needed
- Pick an output format such as Original, JPEG, PNG, or WebP
- Compress and download the result
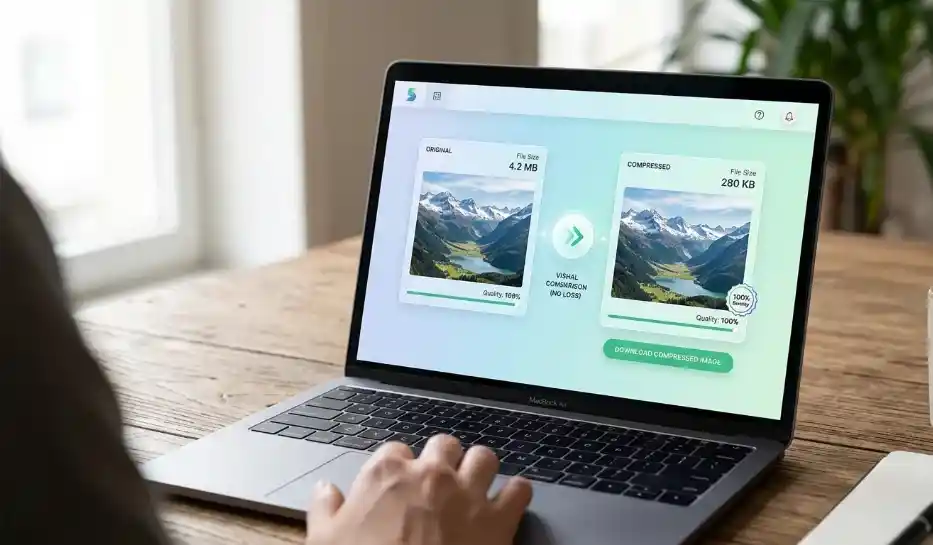
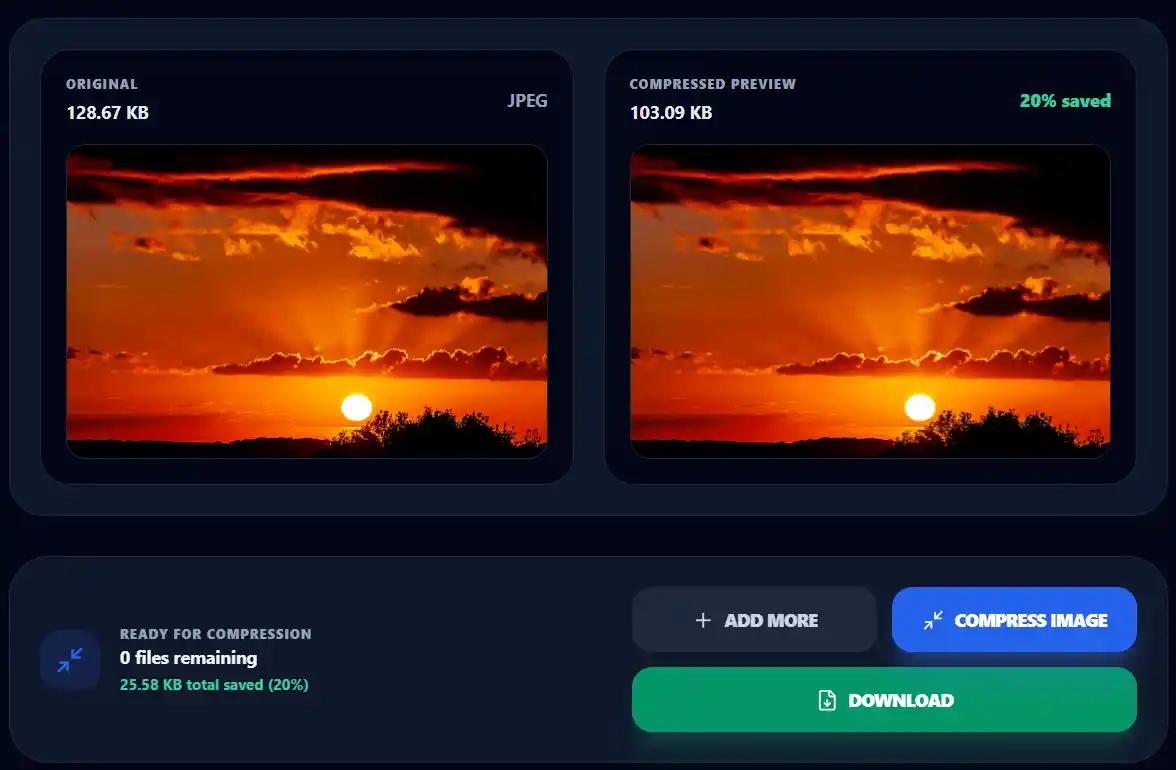
The default Balanced preset is the best starting point for most users. It usually cuts a meaningful amount of file size without creating obvious visual damage.
If you upload multiple images, you can enable Apply To All and process them in a batch. That is useful when you are preparing blog images, product photos, or social assets in one pass.
Best Settings for JPG, PNG, and WebP
Not every format behaves the same way, so the best setting depends on the kind of image you are working with.
For photos:
Use JPEG or WebP. Start with Balanced and adjust only if the file is still too large. WebP usually gives better compression at similar visual quality.
For screenshots and graphics with text:
Be careful with aggressive lossy compression. Text edges and icons can degrade quickly. If clarity matters more than maximum savings, test PNG or use a gentler quality level.
For transparent images:
Keep PNG if transparency is required, or test WebP if you want a smaller file with modern browser support.
If you want better web performance, convert the file with the JPG to WebP Converter.

A useful way to think about it is this:
| Image type | Best starting format | Best starting preset |
|---|---|---|
| Photos | WebP or JPEG | Balanced |
| Screenshots | PNG or gentle JPEG/WebP | Gentle |
| Logos with transparency | PNG | Gentle |
| Ecommerce product photos | WebP | Balanced |
When Compression Is Not Enough
Sometimes the file stays large even after clean compression. That usually means the image dimensions are far bigger than the actual display size.
For example, a blog content area may only show an image at 1200 pixels wide. If you upload a 4000-pixel image, compression helps, but resizing that file to a realistic width often saves much more.
This tool keeps the original dimensions intact during compression. That is intentional. It helps you reduce file weight without changing layout behavior.
If you still need a smaller result, the next step is to use an image resizer before publishing.
How to Tell If You Compressed Too Much
The biggest mistake is chasing file size without checking image quality at normal viewing size. A tiny file is not a win if the image looks cheap or unreadable.
Watch for these signs:
- blurry edges
- blocky textures
- smeared details
- halos around text or icons
- flat-looking skin or background gradients
If you see any of those, move from Maximum back to Balanced, or raise the quality slider slightly.
Why Browser-Based Compression Is Better for Privacy
A lot of online image tools upload files to a remote server, process them there, and return a download link. That can be fine for public assets, but it is not ideal for personal files, client work, or anything sensitive.
This compressor works locally in the browser using canvas-based image processing. That means your data never leaves your device during the compression workflow.
For users, that is simpler and safer. For developers, it is also a cleaner architecture for common image tasks that do not need backend compute.
Common Image Compression Mistakes
The first mistake is using PNG for every image. PNG is useful, but it is often the wrong default for photos.
The second mistake is using the most aggressive setting immediately. Heavy compression can save space, but it can also quietly damage trust if product images, blog graphics, or client visuals start looking rough.
The third mistake is skipping format conversion. If a large image is still a JPEG or PNG by habit, testing WebP can often produce a much better result with very little visible loss.
Who This Tool Is Best For
This tool is useful if you need to:
- reduce image size for websites
- prepare product images for ecommerce
- compress blog images before upload
- shrink email attachments
- convert heavy photos into WebP
- batch-process multiple images at once
It is especially useful if privacy matters to you. Since everything runs in the browser, you get a faster workflow without handing your files to a third-party server.
FAQ
Does compressing an image always reduce quality?
Not in a way you can always see. Good compression removes unnecessary data while keeping the image visually close to the original.
Is WebP better than JPEG?
Often, yes. For many photos, WebP produces a smaller file at similar quality. It is usually the best place to start for web delivery.
Should I resize or compress first?
If the image dimensions are much larger than needed, resize first or do both. Compression helps, but oversized dimensions keep files heavier than necessary.
Can I compress PNG files?
Yes, but the savings may be smaller than with JPEG or WebP. PNG is better when you need transparency or very crisp edges.
Pro Tip
If you want the biggest win, do not rely on compression alone. A large image often gets dramatically smaller when you combine realistic dimensions with WebP output and a Balanced quality setting.
Try the tool
Compress your image in the browser
Reduce image size without sending files to a server. Your data never leaves your device, so you can compress JPG, PNG, and WebP images privately and download the result in seconds.
Open Image Compressor